Tuesday, January 31, 2012

Second grade potters

"This is for my rock collections, I made different sections to sort the rocks."


"Well, to do this, I used black pastel; oil pastel, and I colored it, kind of hard. Then I did green watercolor on top. The texture is from when I made the snake on the mat, the mat dented it."


Monday, January 30, 2012

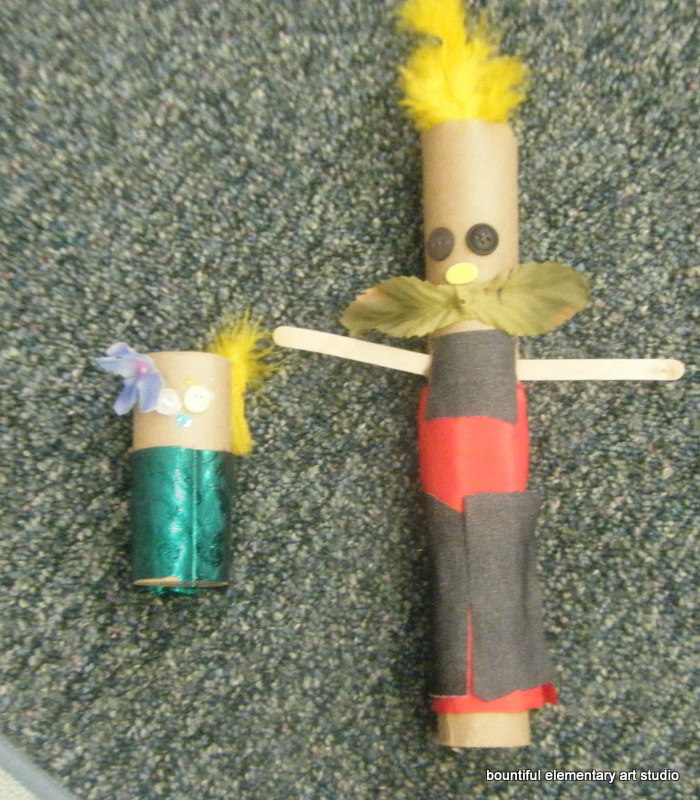
The Human Figure

"They're tube people, those leaves are his mustache."


"She has a little purse, and that's her baby."

"I just cut a face out of a magazine, and found pretty magazine pages to make a dress. It was hard to make her arms stay on."


"The material is the clothes, and then I drew the face and hands and feet."
"It's a colorful dog! She's a girl dog."

Monday, January 09, 2012


These snails and matching baskets were made by two second graders, who collaborated on the size of the creatures as well as the color scheme.


Using some ceramic face parts, this second grader made "a funny guy. I drew eyes on him and gave him spiky hair, too."

This tiny quilted pillow was created by a second grader as a gift. "She'll be surprised when she gets it. I know she'll like it, because she likes sparkly stuff."


"This is the beach, there's water, and sand, and a coconut tree. And that's where they have the fire. Hey! Do you think I could put real fire in here?"

Saturday, January 07, 2012


Some ceramic pieces, painted with watercolors, created by first graders.


A second grader created this scene, he worked on it for several weeks. I asked him to tell me about the work, and he said, "Well, you can pretty much see everything that's happening in the story. I don't really need to tell you about it."

"It's a army tank, and those are the guys. Army guys. I painted it camoflauge colors. That's so the bad guys can't see it."

Friday, January 06, 2012

Uninhibited

"It's a bird feeder. I drew a picture of a bird on it, so the bird knows to go there. I'm going to ask my mom for some bird stuff. Like crumbs and raisins. And hang it from the tree outside."


"I'm drawing a pirate ship. There's bad guys on it. AND ghosts, too."


Tuesday, December 06, 2011

Happy Holidays!
Students work hard to create holiday decorations. They come up with their own ideas, or take inspiration from classmates.
"This is a tube, decorated with ornaments, I couldn't glue the star to the top of the tube, so I put this thing [souffle cup] on top, then glued the star on."

"The white stuff is snow, and there are ornaments, and I found a wooden star for the top. 'Cept at my house, we don't have a star on top, we have a angel."


The artist the created this ceramic Santa Claus modeled him after a fabric Santa Claus she'd made in class earlier.

Pastels and watercolor, on construction paper. 

An amazing 3-d paper sculpture that includes a Christmas tree, fireplace, gingerbread man, and even a stream!


Wednesday, November 30, 2011

Drawing
 This artist studied some giraffe figures from different angles. She drew outlines, then filled in details
The above drawing was created by a kindergartner. "It's a robot. No, it's a machine robot! And it's going fast."

Two first graders drew these pictures side by side, giving each other advice and ideas. These drawings are "mostly designs, like a maze."

Tuesday, November 29, 2011

Art is messy
"I know what art is for! Art is for being creative, and it's okay if you get messy!"
-Kindergarten boy, talking to classmates
It's true, art can be very messy. Definitely untidy. When the artists get going, there is a flurry of art bits going everywhere. Glue, tape, paper, fabric, and more. And, as an art teacher, I am okay with it. That flurry of activity indicates massive amounts of inspiration and creativity at work. Students are learning problem solving and critcial thinking skills. 

 A kindergartner experimenting with glue, scissors, and paper.

"Well, first this was going to be a hat, but it didn't really work that way, so I made it into a decoration that you can hang over a baby's crib. So the baby has something to look at."


This creation, made from strips of cardboard was almost as tall as the artist!

"Well, it's a beach, this is the coconut tree, and that's the sand, and there's little shells on it."


Here is a large creation, put together at the construction center. Unfortunately, I've lost the narrative that accompanies this charming piece. I'll try to track down the artist this week.

"This took SO long to make! Do you like the little pom pom guy? He has button eyes!"

"Well, it's a beautiful ornament for the Christmas tree. It was hard to glue the pretty fabrics on, they kept sliding."

Saturday, November 26, 2011

d
Fiber Arts
Fiber arts include sewing, weaving, braiding, macrame, and more. Because of some very generous fabric and yarn donations, our fiber arts center is well stocked!

"I made a Santa ornament for the tree."


"So, I made a pom thing from yarn. You want me to show you how I did it? I can teach the other kids, too. I made it pretty fast. Then I found these things to make it into a face. His mouth is a feather, but it is the shape of a mouth, right? And it was just like that, I didn't have to bend it or anything!"


"Well, this is a mummy. And I just got some of this stuff, and then twisted it around the wire."

About Me

My photo
Bountiful, Utah, United States

How does TAB work?

To implement TAB, I began with 1 center--the drawing center. It contains different drawing media: pens, pencils, crayons, markers, pastels, chalks, as well as various papers. Also included are dozens of different "How to Draw" books. We discuss as a class what artists draw. Some draw real things, or pretend things, or non-objective designs.

I also discuss the variety of drawing media available, and explain how to clean up.

It is amazing how much the kids enjoy this. I've recently added plastic animals and dinosaurs for the kids to look at while they draw.

The second week, I introduced the collage center, containing colored paper, glue, glue sticks, staplers, scissors, brads, and fabric.

I showed them some collages by Romare Bearden, as well as many student created works. I had to tell them how to determine what adhesive to use, and showed them the stickyometer poster.

They could then choose to go to the collage center, or the drawing center. The kindergartners LOVE the collage center. I love to watch them create. They are so free, so unlimited.

The third week, I opened the watercolor center, with watercolor pans, brushes and paper. The main focus for me was to teach them how to care for the brushes, put on smocks, and where to put their work to dry. They could then choose watercolor, drawing, or collage.

I kept it with just three centers for a few weeks (I see them once a week). It's important for them to learn to care for their supplies and the classroom. But while I wasn't introducing new centers, I did introduce new materials into existing centers, explaining their use (for example, I added whiteboards and markers to the drawing center). I also demonstrated new techniques (crayon resist with watercolors). And I've even started to integrate art principles and elements. Of course I included numerous examples and prints from to reinforce the concepts.

With those three centers humming along, I added the clay center. I did a super brief demo, showing them how to work with it. I did tell them that they could simply create with the clay and not try to keep it, or they could create things for me to fire in the kiln. I gave them admonitions like: "Clay can't be thicker than your thumb, or it will take too long to dry." and"Be sure to join any attachments securely". (Which we all know is MUCH easier said than done!)

Of course, the day I introduced clay, ALL the kids wanted to use it, but I had to limit it to eight. The kids grumbled a bit, but soon were off to other choices (it helped that I introduced craft sticks and chenille stems at the collage center!).

I tried to be as hands off as possible at the clay center. I stayed at the table with them, giving demonstrations as necessary. Joining clay is very difficult, but the determined kids will learn. One third grader created an adorable dog with toothpick thin legs barely hanging on. She wanted me to fire it. I knew there was no way that those pitiful little legs could hang on, I said, "Okay, but you'll need to put it on the shelf to dry." The shelf was only a couple of feet away, but poor little dog was legless by the time he got there! I will admit I felt more than a little coldhearted, but really, this is the only way for them to learn! The student sat with me, and I demonstrated joining and adding just a bit of moisture for her. She worked and worked on that dog, and it finally came together.

After clay was going (it took several weeks for all the students to have a chance, and I stayed at the clay center so they could all have some individual instruction), I was free to add some more centers.

First, I added painting with tempera paints. Next was the architecture or "temporary art", containing legos, blocks, cuisenaire rods, magnets, mosaic boards, and geoboards. This is where the students learn hands on about spatial properties and design elements.

I introduced the fiber center, with weaving and sewing. Kids truly enjoy this one, but they do need significant hands on instruction (especially threading the needles!) and I've put this one away for a bit.

The collage center was joined by the construction center. They can use cardboard, small boxes, and other castoffs to create. Kids have made houses, boats, star wars aircraft, cameras, and so much more here. Their adhesive of choice, though, is tape. Rolls and rolls and rolls of tape! I've spent some time with them, encouraging them to use some of the glues we have, or even to paper mache over the tape, but very few takers so far.

Now, midway through the year, with many centers going, I can work with the students on some art history and appreciation.

TAB is truly a wonderful teaching method. The kids can create things because THEY want to, not because I (or some other teacher) think they look neat. The energy and excitement in the room during class time is thrilling! I LOVE my job!

Blog Archive

A different approach to art education:

TAB stands for Teaching Artistic Behavior It is a research-backed, student driven method. Kids are taught a new concept, technique, or medium each class period, and then are able to choose what art to make.

The idea is to teach them to work like artists. We talk about how artists get ideas, where they get inspiration, and how they behave.

I teach using the district curriculum, find it here.